Changelog
Follow up on the latest improvements and updates.
RSS
We are excited to announce that upon receiving approval from Google, this feature is now available for all users.
Users can connect their personal or workspace Gmail accounts and Sync Outgoing & Incoming emails between the CRM and Gmail accounts.
Users can use their personal or workspace email accounts to send, receive & track emails.
The sync will be established between both platforms when an email thread is initiated from the CRM (first outbound message). All the subsequent emails in the thread will be in sync between both platforms.
This feature is a user-level setting and does not impact other users in the sub-account.
Sender Domain mapping for different types of Emails:📧
- Individual Email: When connecting a personal email account (Gmail), the Gmail email ID will be used as the sender domain for individual emails sent by the user.
- Bulk Email: If the user enters their personal email ID (post connection) under the “From Field”, the user email ID will be considered as the sender domain for the bulk emails. If the field is kept blank, it will consider the sub-account level provider as the sender domain.
- Bulk Email: If the user enters an email address that differs from the personal email address connected (Gmail), the sub-account level provider will be used for sending emails.
- Workflow & Automation: Delivery of emails will continue from sub-accounts.
We're excited to announce the launch of Content AI in the Social Planner! The ultimate writing assistant that can help you generate high-quality content at least 2X faster and with minimal effort.
Content AI allows you to quickly generate high-quality social media content with specific tones to match your brand. You can even assign keywords so that all your posts are optimized.
✍️ How to create a Social Post with Content AI?
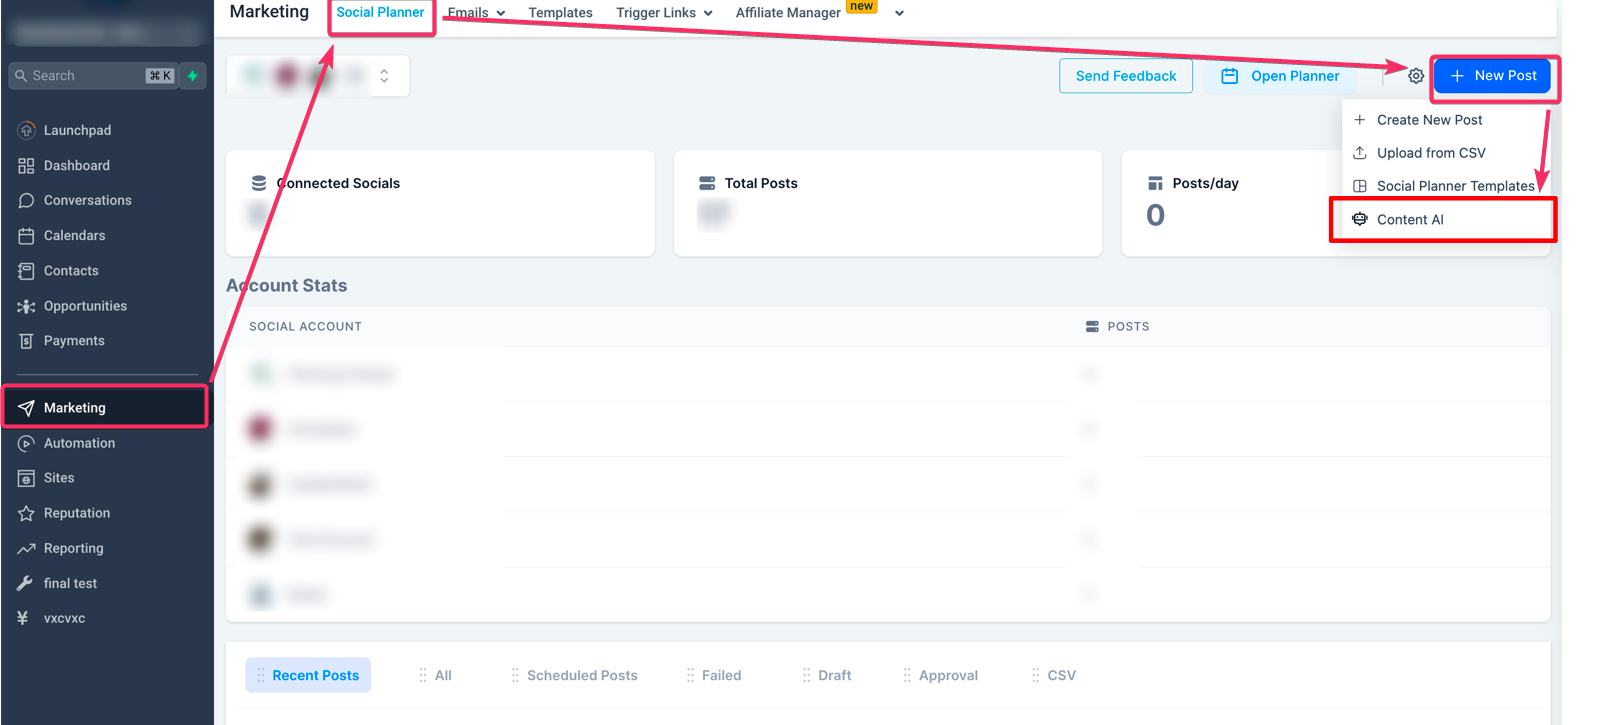
Step 1: Go to Marketing > Social Planner > New Post

Step 2: Choose the option to create a new post with Content AI.
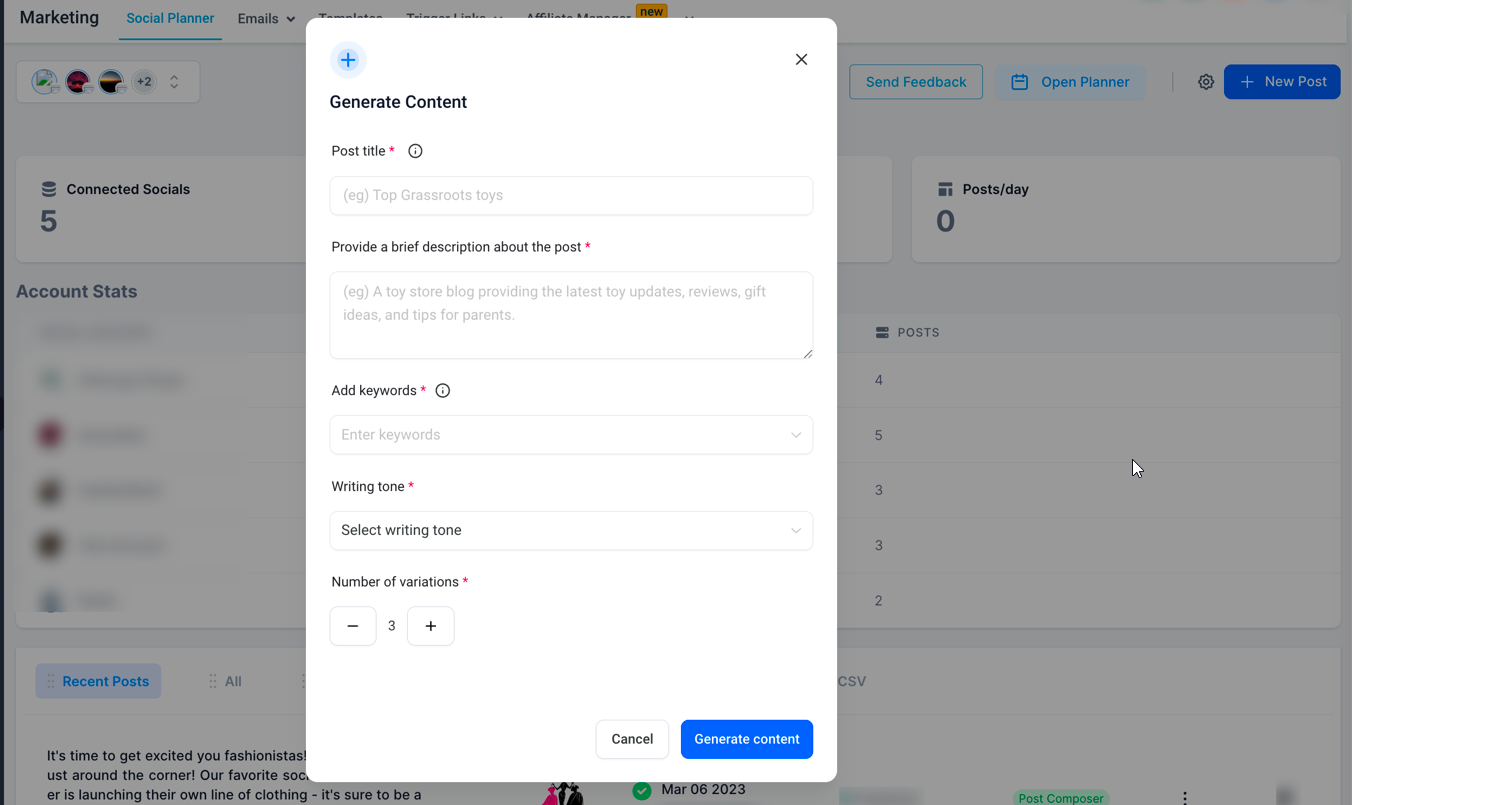
Fill in the details, including the post title, post description, keywords, tone of the content, and the number of variations you'd like to generate.

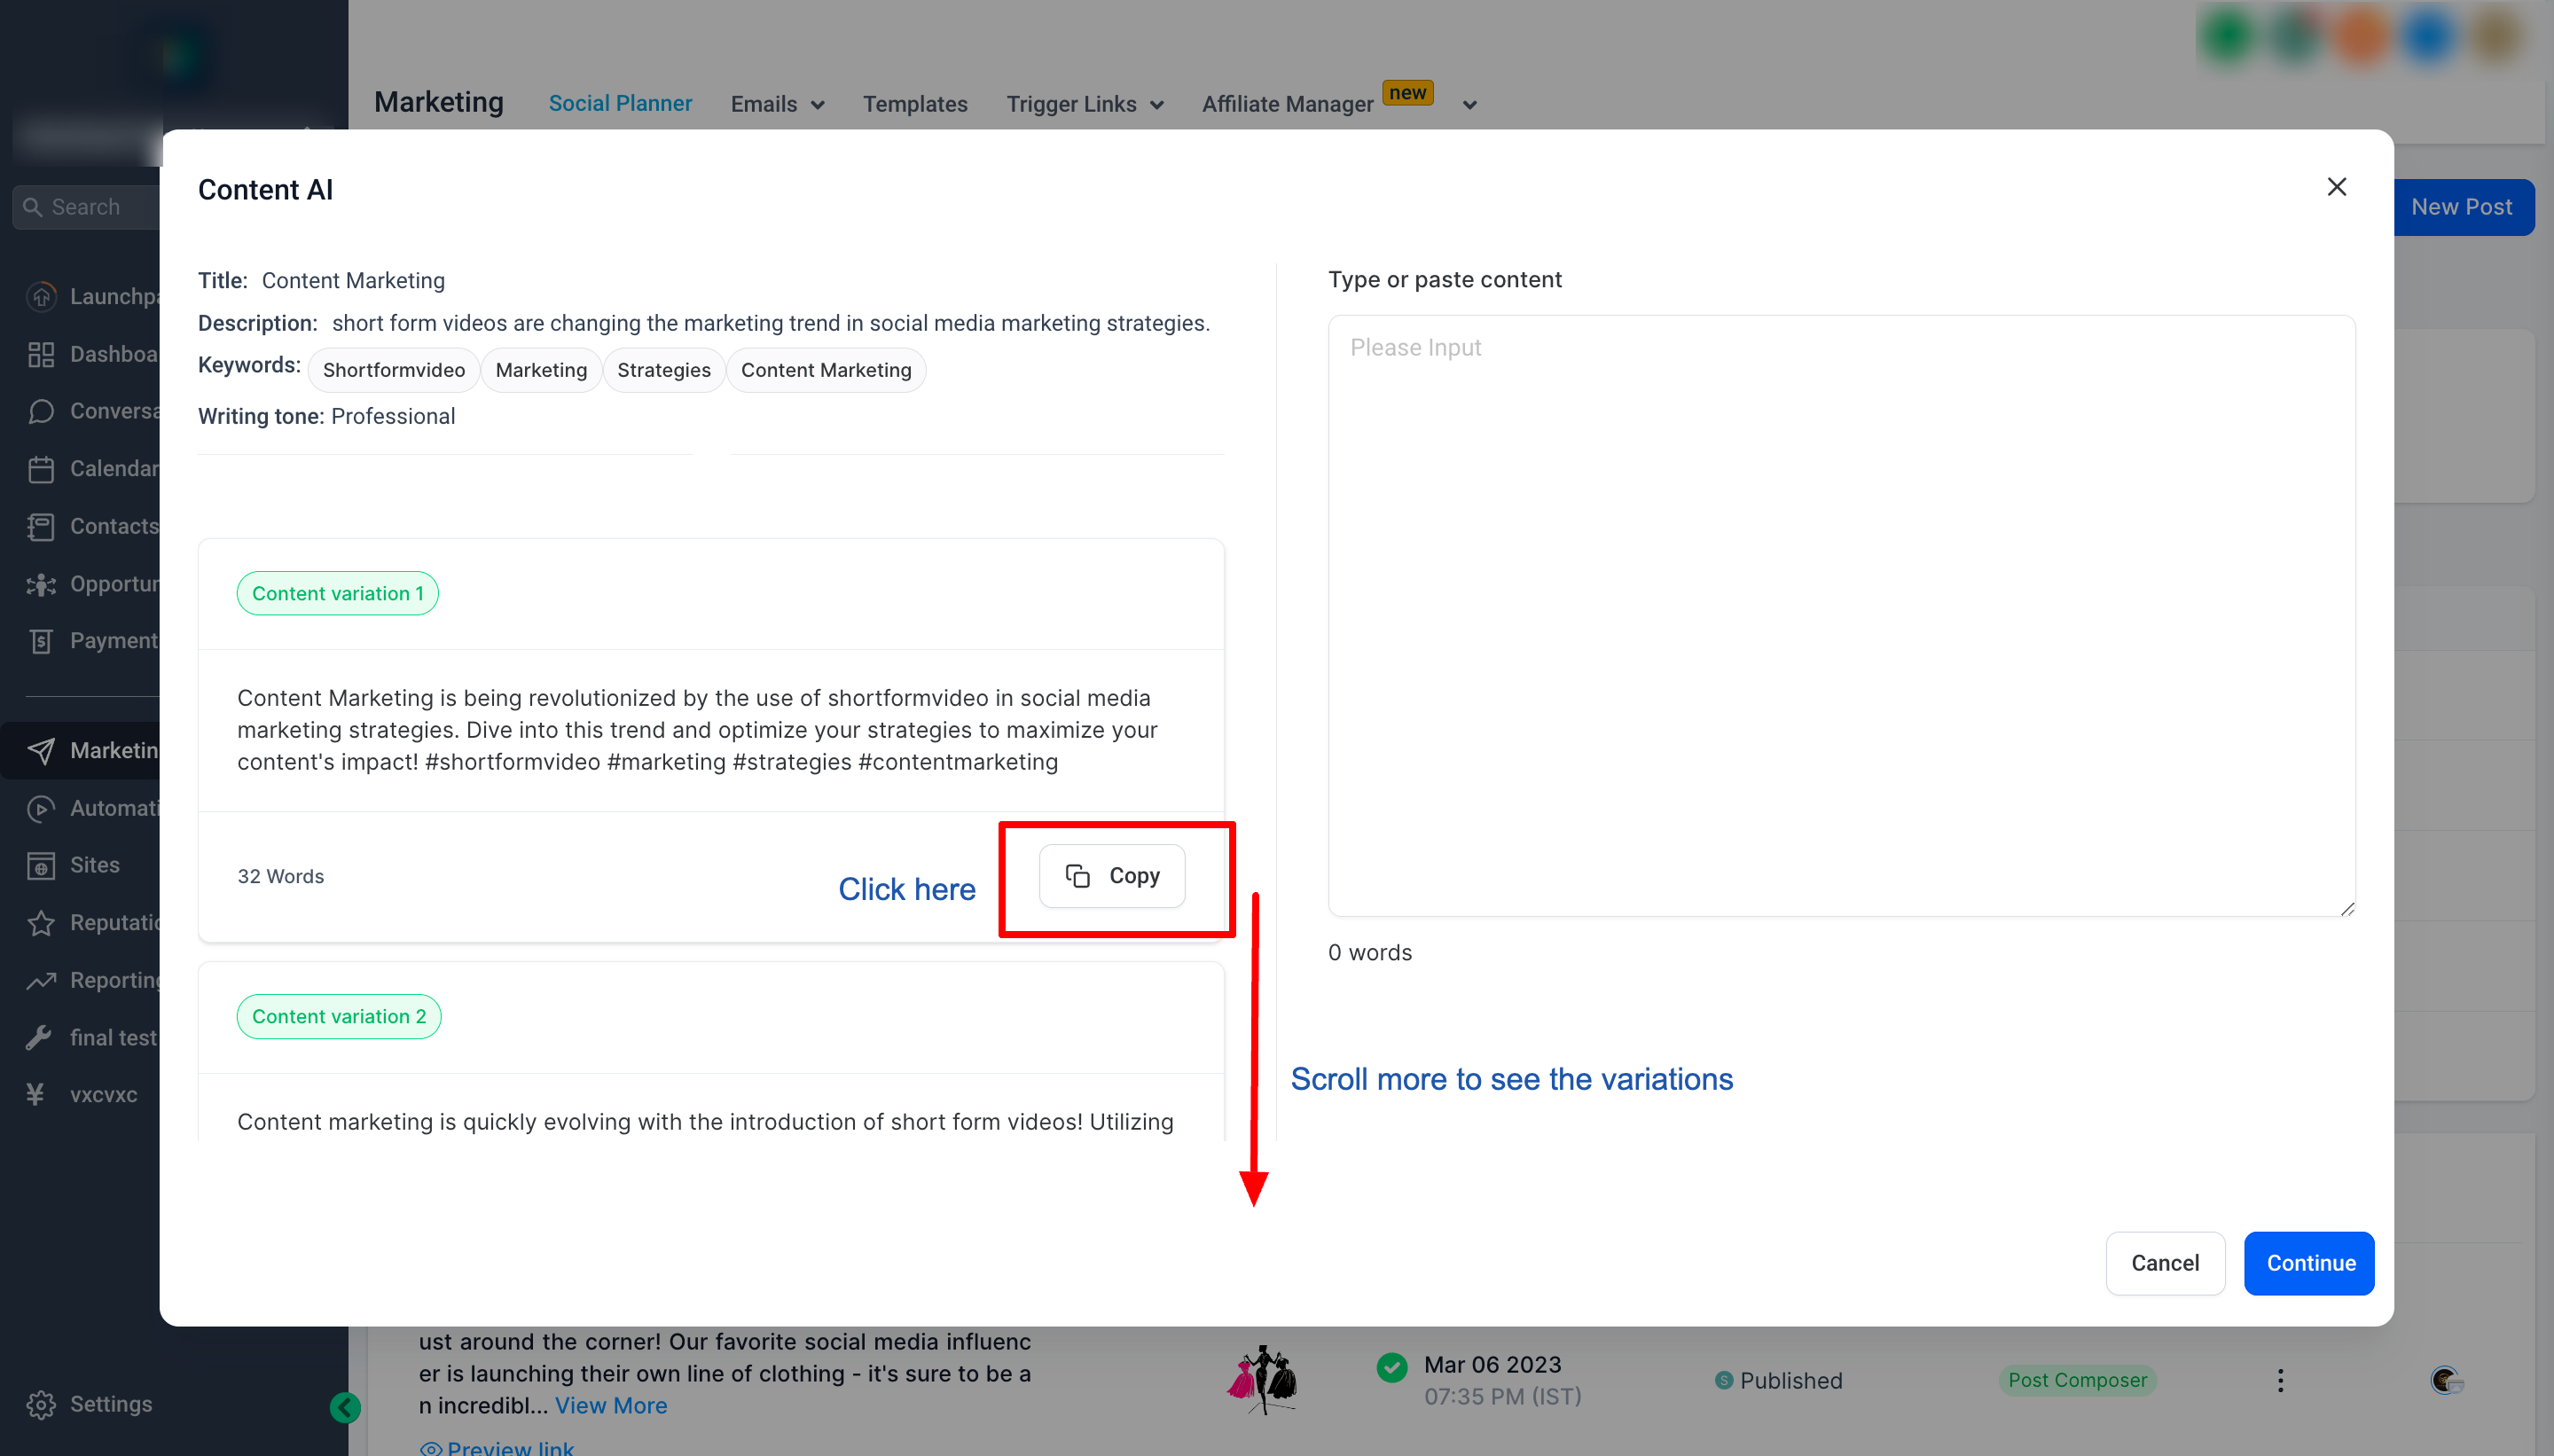
Step 3: Once you've filled in the form, it will generate variations of suggested prompts. Simply choose the one that best fits your needs and copy the variation content, which will appear on the right side of the editor space.

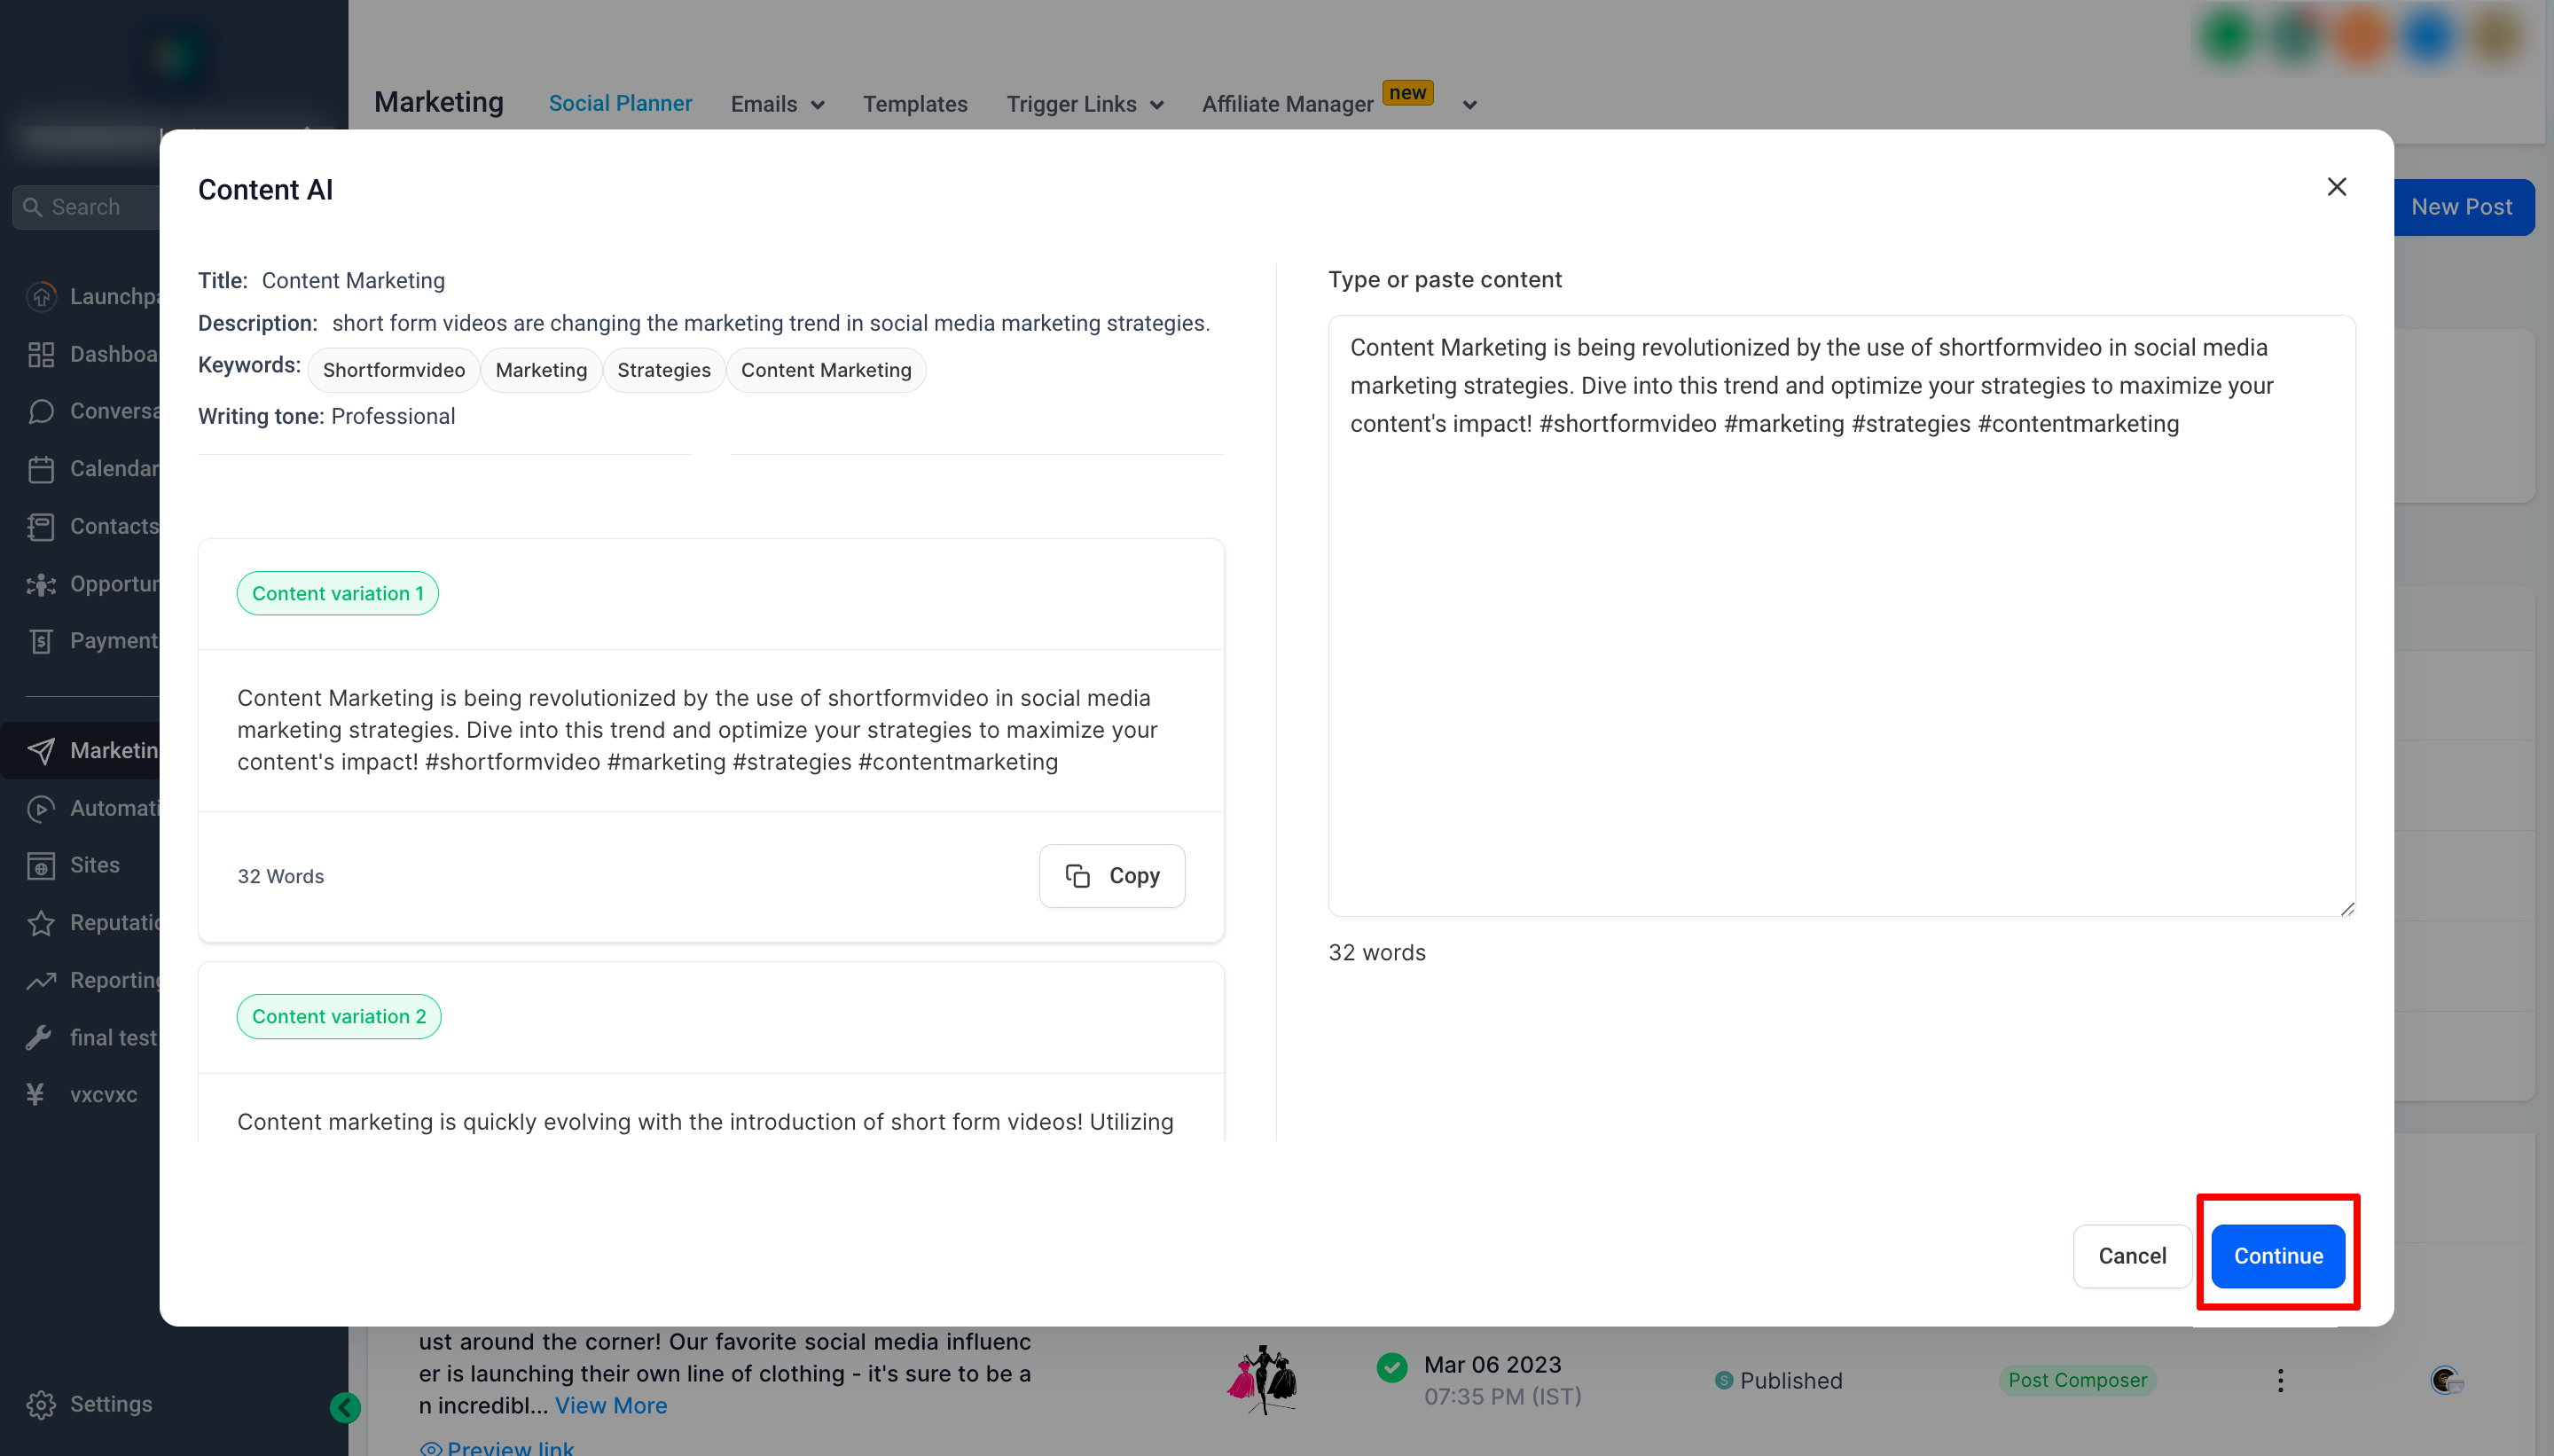
Step 4: If you're satisfied with the details of your post, click Continue, and you're done!

Authorize.net integration is now live under Payments -> Integrations. Connect using your Login Id, Transaction key, and Signature key from the merchant portal.
Supports processing 1-step, and 2-step order forms purchases along with one-click upsells, invoices and recurring templates along with auto-payments, Text2Pay links, and calendar appointment booking payments.
No new products are required to be created for using Authorize.net, it will work with existing products in place.
Supports one-time and recurring payments along with auto payments in recurring templates
Track all transactions and subscriptions using the Transactions and Subscriptions page under the Payments menu.
Ability to cancel a subscription/recurring template created at any time using the Cancel action
Specify the default gateway for order forms and invoices in case both Stripe and Authorize.net are connected.
- Fixed the issue of funnel stats not updating for purchases made via Authorize.net.
- The order Submitted trigger now works with Authorize.net checkouts. Users can use the trigger along with order related custom values and shopping cart in email builder to auto-populate product line items purchased during checkout.
- Fixed the issue of users not being able to checkout with Authorize.net for Visa Cards starting with 40 and some Master cards starting with 52/53.
- Updated the logic in merchant initiated record payments using card or scheduling of Auto payments in recurring templates using Authorize.net to handle cases of additional FDS filters defined in the merchant portal. In this case merchant will be notified that FDS is not allowing the transaction to happen.
- Updated the logic for customer initiated payments in invoicing with Authorize.net. This will not allow payments to be in a pending state due to FDS and the end customer will be notified to contact the merchant for accepting payment.
Enhancement
- Introduced the support for Google Analytics 4 (GA4), the latest version of Google Analytics. GA4 provides enhanced event-tracking capabilities and an advanced view of user behaviour across different platforms.
- Liftegy has introduced an enhancement to track GA4 events with the measurement-id and API secret which means that users can now use GA4 tracking with their CRM accounts. This will allow them to track and analyze user behavior and engagement across different channels, including their website, mobile app, and social media platforms.
Steps to set-up GA4 in Workflows:
- - In your Google Analytics Workflow, select the action 'Add to Google Analytics.' A new dropdown value under 'Action Type' has been introduced by the name 'Google Analytics 4'; select this from the dropdown.
- - Go to your Google Analytics account and fetch the measurement-id from Admin ➝ Account Settings ➝ Data Stream ➝ Select the Data Stream. Copy and paste the Measurement ID for your desired Data Stream:
- - Add the event name that you wish to track. This event name will show-up under the Google Analytics ➝ Reports ➝ Engagement ➝ Events along with other standard events that are set-up.
- - Add the API secret by navigating to your Google Analytics account Admin ➝ Account Settings ➝ Data Stream ➝ Select the Data Stream ➝ Measurement Protocol API secrets.
- 1. - Save and Publish your workflow.